"I can never read all the books I want; I can never be all the people I want and live all the lives I want. I can never train myself in all the skills I want. And why do I want? I want to live and feel all the shades, tones, and variations of mental and physical experience possible in life." ~Sylvia Plath

Wednesday, March 23, 2011

Chili

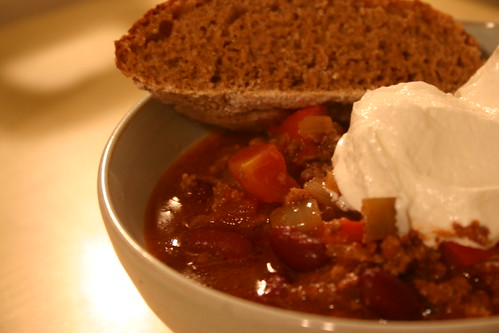
Chili (2)Who would have thought that the first week of spring would bring with it snow and sleet. I decided to take advantage of the last remainder of cold weather to make some chili to eat along with my anadama corn bread.  I took a recipe from America's Test Kitchen and modified it slightly to make it a bit spicier.


Beef Chili
2 T vegetable oil
2 onions, chopped
1 red bell pepper, chopped
1/4 cup chili powder
1 T cumin
1/2 tsp cayenne pepper
6 cloves garlic, minced
2 lbs. lean ground beaf
2 cans dark red kidney beans, rinsed
1 can diced tomatoes
1 can Rotel mild diced tomatoes and green chilies
1 can diced tomatoes with green chilies (store brand)
1 can crushed tomatoes


Chili
  • Heat the oil in a large Dutch oven over medium heat until shimmering
  • Add the onions, bell pepper, chili powder, cumin, cayenne, and 1/2 tsp salt.  Cook the vegetables until they have softened.
  • Stir in the garlic and cook for ~15 seconds.
  • Add the beef and increase the heat to medium-high.  Cook until the beef is no longer pink.
    Chili (1)
  • Stir in the beans, cans of tomatoes, and 1/2 tsp. salt.
  • Bring to a simmer, cover, and cook for 45 minutes.
  • Remove the lid and continue to simmer until the beef is tender, about 45 minutes.  Season with salt and pepper to taste.
If you don't like your food too spicy, just use 2 cans of regular diced tomatoes and 2 cans of tomato puree.


Top it with a large dollop of sour cream, sharp cheddar cheese, and/or fresh slices of avocado.  Enjoy!

Anadama Bread

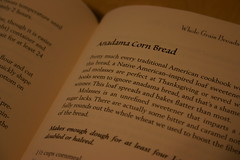
Anadama (1)I timed this bread perfectly.  I made the dough last night and then woke up (after sleeping in thanks to my 2-hour delay) to a mix of snow, rain, and sleet.  Anadama corn bread is a traditional Native American cornmeal based bread.  So, to go along with my "cornbread" I was planning on making chili ... the perfect cold/miserable weather meal.

This recipe is another one from my much loved cookbook - Healthy Bread in Five Minutes a Day.

Ingredients
1 1/2 cups cornmeal
1/4 cup wheat germ
2 1/4 cups whole wheat flour
3 cups unbleached all-purpose flour
1 1/2 T granulated yeast (or 2 packets)
1/4 cup vital wheat gluten
3 1/2 cups lukewarm water
1/2 cup molasses

Mixing and Storing
Whisk together the cornmeal, wheat germ, flours, yeast, salt, and vital wheat gluten in a  5-quart bowl.

Anadama
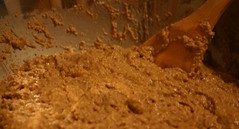
Combine the water and molasses (stir to dissolve the molasses in the water) and mix them with the dry ingredients using a wooden spoon.

Cover with a cloth and allow the dough to rest at room temperature until it rises and collapses (or flattens on top) for approximately 2 hours.

The dough can be used immediately, but it is easier to handle when cold.  Refrigerate the dough in the bowl covered (but not airtight).

Baking Day
Cut off a grapefruit size piece.

Prepare a silicone mat with cornmeal.
Anadama (2)
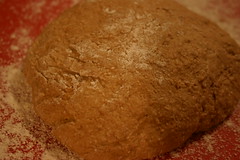
Dust the piece with flour and quickly shape it into a ball by stretching the surface of the dough around to the bottom on all four sides, rotating the ball a quarter turn as you go.

Allow the loaf to rest, covered loosely with plastic wrap, for 90 minutes (40 min. if you are using dough before refrigeration).

30 minutes before baking time, preheat the oven to 450 with a baking stone placed in the middle rack and an empty metal broiler tray on the rack below.

Just before baking, brush the surface of the dough with water and then cut the loaf with 1/4-inch deep parallel cuts using a serrated knife.

Slide the loaf onto the hot stone and pour 1 cup of water into the broiler tray.  Quickly close the oven door.

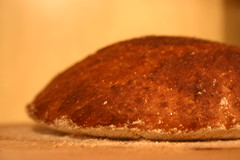
Anadama (3)Bake the bread for about 30 minutes, or until the bread is richly browned and firm.

The bread tastes like a mix between corn bread and wheat bread with a strong "hint" of molasses.  It is excellent, but I think I was expecting it to taste like a more traditional corn bread.  It was not a bad surprise, just different from what I thought it would be.

Sunday, March 20, 2011

Happy Spring

seeds
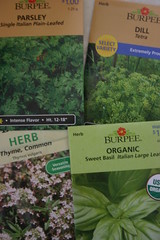
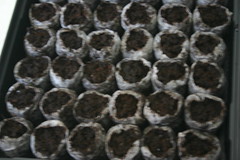
peat potsmini greenhouseIn honor of the first day of spring I planted my herbs - thyme, basil, parsley, and dill.  I have found the easiest way to grow things from seed is to invest in a little "greenhouse" from Lowes or Wal-Mart.  They come in a variety of sizes.  I choose the smallest one since I'm not planting an entire garden.  I'll keep a few for myself to re-pot into larger containers and I'll give some to my parents.   I'm sure I'll still have many extra plants ... so if you are interested, put in your request now :)

Saturday, March 19, 2011

March 7-15

When taking pictures, I many times find myself drawn to the seemingly ugly and rundown.  A rusted out dumpster, peeling paint, a rundown alley, an abandoned building ... all attract me.  There is a somewhat haunting or worn-out aesthetic in these photos that I appreciate. 


"For every beauty there is an eye somewhere to see it."  ~Ivan Panin

To view my entire 365project, click here.

Monday, March 14, 2011

February 28-March 6

Downtown Selinsgrove is quite quaint.  It is about 2 blocks and stays alive thanks to the local University.  There are several restaurants, a few bars, a wonderful micro-brewery, a couple hair salons, a cozy cafe, and a variety of other businesses.  My favorite establishment is the local used bookstore.  I cannot walk in without entering into a fascinating conversation with the owner and leaving a book or two richer. 
For the 6 years that I have lived in Selisngrove, I have lived within walking distance of the downtown.  I love being able to walk to the post office or the library or to get something to eat ... it is quite convenient and holds a certain charm that suburbia lacks.  So, on a recent walk, I snapped a few pictures that capture the flavor of Selinsgrove.

Wednesday, March 2, 2011

18 Miles of Books

18 Miles of BooksThis past weekend, I was in NYC visiting my sister, brother, and sister-in-law.  We had some time to kill before our dinner plans, so we stopped at one of my favorite book stores ever ...  Strand Book Store

Yes, no need to pinch yourself, it's true ... 18 miles of books.  Barnes and Noble and Borders cannot compete.  Not only is the sheer quantity of books amazing, but the organization and displays are equally impressive.  The shelves are all made of true wood (not laminate or compressed whatever made to look like wood) and there are wooden "tables" displaying books throughout the main aisles.  One of my favorite parts about the store are the random ladders throughout the aisles for anyone (not just store employees) to use.  I LOVE that!  I didn't take any pictures in the store, but I found one on flickr so you can see a ladder in the aisle.

Those close to me are fully aware of my recent love affair with Rainer Maria Rilke.  If you follow me on Facebook, you've probably also noticed that I tend to post a lot of quotes by him.  I hunt down the poetry section in every book store which I step foot to see if they sell any Rilke.  Usually they do, happily.  Not so happily, the books are always quite expensive, so even though I love his poetry, I did not yet own anything by him.  That all changed this weekend.  Thanks to Strand's amazing prices, I purchased a book by Rilke with a publisher price of $14.00 for less than $8.00 after taxes.

I will leave you with Sonnet 7 from his collection Sonnets to Orpheus, the second series.  They're all amazing, so I just picked one.

I wish I could speak with such beauty about flowers being cut and arranged :)


Flowers, ultimately sisters of arranging hands
(those hands of girls from now and then)
who often lay from end to end across the garden
table, drooping and gently wounded,

waiting for water that would rescue you.
once more from that beginning death, and now held
up again between the streaming poles
of sympathetic fingers that can do

even more good than you guessed, light ones,
when you found each other again in the vase,
cooling slowly, exuding warmth of girls like confessions

from yourselves, like dreary and exhausting
sins committed by your being plucked, but as
a bond again with them, your allies in blooming.

Photo used under Creative Commons license from http://www.flickr.com/photos/16151021@N00/4400554590/.

Bread à la Jamie

My brother's girlfriend, Jamie, is an incredible baker.  Her family bakes 4 loaves of bread each week, and for many years, she was in charge of bread baking.  She has truly mastered the art of baking bread.  I feel so lucky to get to learn from her.

Ingredients
~10 cups all-purpose flour
1 T salt
2 packages of active dry yeast
1/4 cup sugar
1/4 cup oil
1/4 cup honey
3 1/2 cups water

Mixing Ingredients
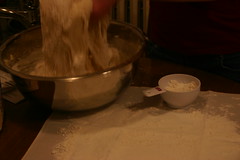
Put hot water in a saucepan.  Put sugar in bowl.  Put oil in saucepan and then honey in saucepan.  If you do it in this order, you only dirty one measuring cup for 4 ingredients ... always a good thing.  Next, place a thermometer in the liquids until it reaches 120-140 degrees.  While the liquids are heating up, put 3 to 4 heaping cups of flour in the bowl with the sugar.  Then add the yeast and the salt.  Mix the dry ingredients with a hand beater.
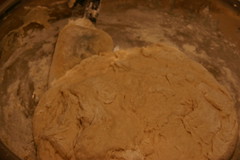
Jamie's Bread (1)Usually at this point, the liquid is hot enough, so add the liquid to the dry ingredients and mix with the mixer while adding it.  Continue adding flour to the mixture until the dough begins to creep up the beaters too much ... aka too stiff to beat.  Then continue to stir with a spoon and add flour until it no longer sticks to the sides of the bowl.
Jamie's Bread (4)
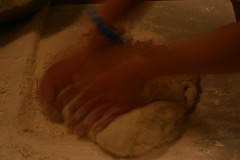
Place a pastry cloth on a flat surface and flour it very well.    Add about 1/2 cup of flour to the bowl to allow you to pick up the dough easier.  Place the dough on the pastry cloth and then add more flour to the bowl to get the last bits of dough from the bowl and spoon.
Jamie's Bread (6)
Knead the dough, adding flour whenever it gets sticky, for no more than 10 minutes.  You are looking for it to be not sticky and to be able to pull the dough and have it bounce back.  It will also feel very smooth when it is ready.
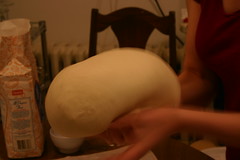


Jamie's Bread (12)Lift up the dough and gather the bottoms to form a smooth dome shaped mound of dough.  Then, spray the bowl and put it over the dough for 1 to 2 hours.  You need to punch down the dough every hour - fold in the side and punch it down.  Then flip it over so that the punched side is down (you can re-gather it to form a beautiful dome if you want).
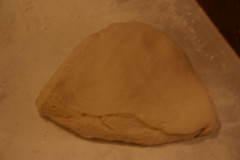
Jamie's Bread (17)After you punch down the dough for the last time (when 2 hours is up), gather the bottoms under to create a beautiful dome.  Place the gathered side down and cut the dome into fourths.  Each piece will look like a triangle.  Take the inside corner and lift it up and flick it several times.  Then take the other two sides and flick them.  This will create a larger, flatter triangle.
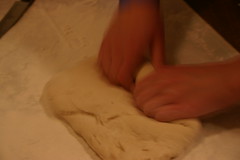
Jamie's Bread (19)Put the pretty side down with the point of the triangle toward you.  Begin rolling the dough away from you.  After each roll, squeeze the roll to make sure the air bubbles are getting out.  Continue to roll until finished, then crimp the end of the dough
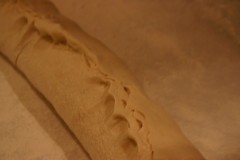
Jamie's Bread (21) with the roll using your fingers and the balls of your hands.  Fold the two sides in and then recrimp as before.  Finally, flip the dough over so that the pretty side is up and size it to the correct length for your bread pan.
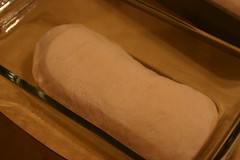
Jamie's Bread (22)
Preheat the oven to 425.  Spray the bread pan with Pam generously.  A larger size bread pan works best.  Place the dough in the pan, pretty side up.  Place a wet towel over the dough and let it rise again for 20-30 minutes.

Put the bread pans in the oven on the second rack from the bottom.  Let it bake for 15 minutes, but check it after 12 to see if the tops are golden brown.  Then, lay foil on top and bake for another 5 minutes.

The loaves are finished when the bottom of the loaf is also golden brown and when you knock on the bottom and it sounds hollow.  Allow to cool out of the pan on a wire rack covered with a towel for about 30 minutes.  Don't put in a freezer for at least an hour ... it should not be hot when you put it in the freezer.

I wish I had a picture of the final product ... but once it was finished, we just began eating it right away ... no time for pictures :)


February 21-27

Finally, I am all caught up on my picture posts.  I need to not let that happen again ... too much work.  The more time that passes, the more daunting the task of catching up is!
I used ImageLoop to create this photo slide show.  I really like the large size of this slide show.

Your pictures and fotos in a slideshow on MySpace, eBay, Facebook or your website!view all pictures of this slideshow

February 14-20

In honor of Valentine's Day, I snapped a series of pictures on roses.  These are all taken from a lovely bouquet given to me as part of a wonderful surprise :)
Click here to view all 365 project pics.

February 7-13

I've been using PictureTrail for most of my photo slide shows, but I just discovered GoodWidgets and I really like it.  Uploading the pictures is a little more time intensive, but the final product is great:)  If you have any suggestions for places to create photo slide show widgets, let me know ... I'd love to test them out!


Powered by GoodWidgets.com

Entire 365 collection is available here.

Tuesday, March 1, 2011

January 31-February 6

Oooh, the month of February just flew by without giving me a chance to upload any pictures.  Time to play catch-up!  As always, to view my entire 365 Project just click here.

Related Posts Plugin for WordPress, Blogger...