Ingredients
~10 cups all-purpose flour
1 T salt
2 packages of active dry yeast
1/4 cup sugar
1/4 cup oil
1/4 cup honey
3 1/2 cups water
Mixing Ingredients
Put hot water in a saucepan. Put sugar in bowl. Put oil in saucepan and then honey in saucepan. If you do it in this order, you only dirty one measuring cup for 4 ingredients ... always a good thing. Next, place a thermometer in the liquids until it reaches 120-140 degrees. While the liquids are heating up, put 3 to 4 heaping cups of flour in the bowl with the sugar. Then add the yeast and the salt. Mix the dry ingredients with a hand beater.
 Usually at this point, the liquid is hot enough, so add the liquid to the dry ingredients and mix with the mixer while adding it. Continue adding flour to the mixture until the dough begins to creep up the beaters too much ... aka too stiff to beat. Then continue to stir with a spoon and add flour until it no longer sticks to the sides of the bowl.
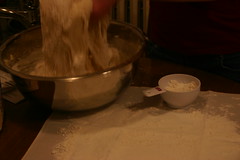
Place a pastry cloth on a flat surface and flour it very well. Add about 1/2 cup of flour to the bowl to allow you to pick up the dough easier. Place the dough on the pastry cloth and then add more flour to the bowl to get the last bits of dough from the bowl and spoon.
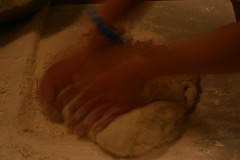
Knead the dough, adding flour whenever it gets sticky, for no more than 10 minutes. You are looking for it to be not sticky and to be able to pull the dough and have it bounce back. It will also feel very smooth when it is ready.
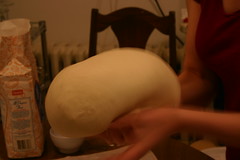 Lift up the dough and gather the bottoms to form a smooth dome shaped mound of dough. Then, spray the bowl and put it over the dough for 1 to 2 hours. You need to punch down the dough every hour - fold in the side and punch it down. Then flip it over so that the punched side is down (you can re-gather it to form a beautiful dome if you want).
 After you punch down the dough for the last time (when 2 hours is up), gather the bottoms under to create a beautiful dome. Place the gathered side down and cut the dome into fourths. Each piece will look like a triangle. Take the inside corner and lift it up and flick it several times. Then take the other two sides and flick them. This will create a larger, flatter triangle.
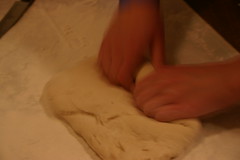 Put the pretty side down with the point of the triangle toward you. Begin rolling the dough away from you. After each roll, squeeze the roll to make sure the air bubbles are getting out. Continue to roll until finished, then crimp the end of the dough
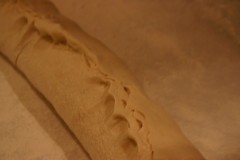 with the roll using your fingers and the balls of your hands. Fold the two sides in and then recrimp as before. Finally, flip the dough over so that the pretty side is up and size it to the correct length for your bread pan.
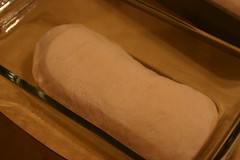
Preheat the oven to 425. Spray the bread pan with Pam generously. A larger size bread pan works best. Place the dough in the pan, pretty side up. Place a wet towel over the dough and let it rise again for 20-30 minutes.
Put the bread pans in the oven on the second rack from the bottom. Let it bake for 15 minutes, but check it after 12 to see if the tops are golden brown. Then, lay foil on top and bake for another 5 minutes.
The loaves are finished when the bottom of the loaf is also golden brown and when you knock on the bottom and it sounds hollow. Allow to cool out of the pan on a wire rack covered with a towel for about 30 minutes. Don't put in a freezer for at least an hour ... it should not be hot when you put it in the freezer.
I wish I had a picture of the final product ... but once it was finished, we just began eating it right away ... no time for pictures :)
No comments:
Post a Comment